My Stamping Corner
Showing posts with label That's Krafty Thursday. Show all posts

Saturday, March 5, 2011

Sweet!!!

We have a brand new grandson!! It's been a busy couple of weeks ~ we were helping out with the older kids (11, 9 & 6) so we had our hands full. They are so excited about their new little brother! They want to hold him constantly...especially the youngest. She is so gentle and loving with him - just like a little mother. It's very SWEET!!  Which brings me to my card....(nice entrance, don't you think?)....

I have had this Mo's Digital image - Bronte and Louis - for awhile and couldn't figure out what sentiment to use with him. I wanted to do a card for my oldest son and thought maybe Louis would work!  I found the sentiments in two different stamp sets and they seemed to work well together. And don't you just love Basic Grey's new Pyrus paper?!! I paired it with Kraft & some old SU! Cranberry Crisp cardstock.

 "Hope your day is....SWEET as can be!!"

I also wanted to do a card to enter in Jeanie's "That's Krafty Thursday" challenge and this one will fit the bill! Sometimes I forget to use my kraft cardstock and also forget how versatile it is!  If you've never visited Jeanie's site (The Spotted Chick), you have a treat in store - her cards are GORGEOUS!! Every time I visit, I get another boost of inspiration!!


Bronte and Louis were colored with Copics. I think I'm finally getting the hang of them! Still a work in progress, but the more I use them, the more I'm loving them!! I did some shading with my Prismacolor pencils/gamsol, stitched around the edges and sponged with Chalk ink. I wanted to add the first part of the sentiment in a half-circle, but it looked a little 'blah' all by itself....so I used one of my smallest Nestabilities to cut out a scalloped circle in cork. I punched holes in each of the scallops to give it more definitioin. I like the way it turned out! A little colored cord and a button and this card is complete! (and no bling or sparkle this time...can you believe it?!!!)

Hope you all have a great weekend!!


Saturday, January 8, 2011

Snowmen....

Unfortunately, I'm one of those people who procrastinates and is always late with everything!  Yep, that's what happened with the Christmas cards - just didn't start early enough! The "thank you" cards weren't ready either, so I'm trying to get those finished and sent out before February hits.

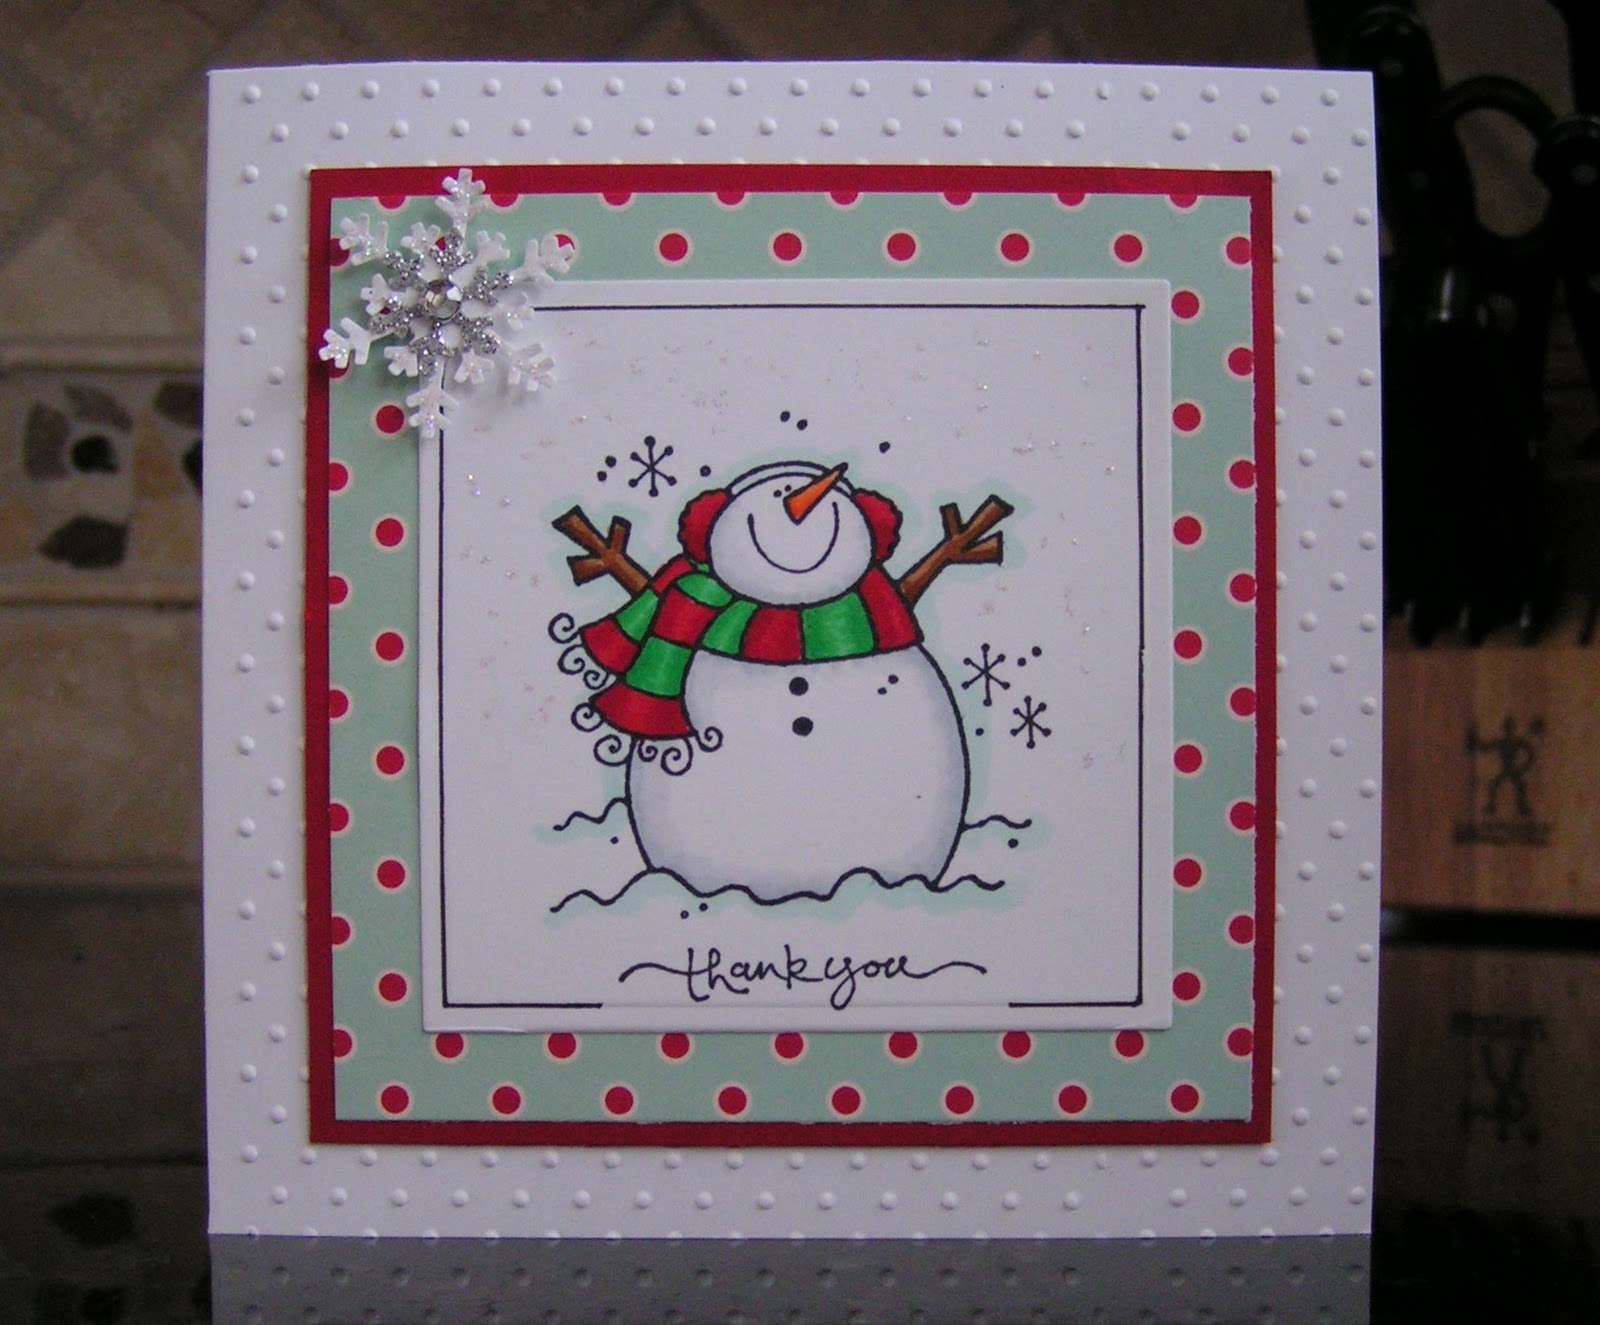
Since it's still winter (brrrr...) and these are thank you cards for Christmas gifts, I figured it'd be okay if these still looked a little Christmassy.  I decided on this Penny Black snowman stamp. He's such a cutie and is pretty quick and easy to color. I did him two different ways - one on white cardstock, the other on Kraft cardstock.
The first one was stamped on Kraft cardstock.  (I'm entering this one into Jeanie's That's Krafty Thursday Challenge #45!) His body was done using a watercolor pen and a SU! White Craft ink pad. I found this technique on another blog, but can't remember which one!!  I dragged some of the ink pad right onto an acrylic block then used the watercolor pen and that ink to color the snowman's body. I used Prismacolor Pencils blended with gamsol to color his scarf, arms and earmuffs. I added some light blue shading around the image, which looks more like white in the picture, but it really is light blue!  After doing a little machine stitching around the edges, I just added some Martha Stewart snow glitter, some Stickles and a couple of punched snowflakes. 


This one was colored with Copics on Bella's Bestest paper. I liked this one right away; it's bright, crisp and clean looking! So I went ahead and kept the completion of the card pretty simple too. Just a run thru the Cuttlebug for some texture, some layered paper and cardstock with some Stickles dotted here and there and a jeweled snowflake.  (gotta have a little bit of bling, you know what I'm talking about?!!)


I used a technique that I found on Jodi Collins' blog here (love her cards!) to create a frame. After stamping and embossing your image, remove it from the die and stamp the sentiment somewhere near the bottom edge. Then pop the image back into the die and trace around the inside edge with a Copic Multiliner leaving some space on either side of the sentiment.  Isn't this a cool technique and so easy to do!! I think it works best with words that are printed versus handwritten style since the handwritten styles seem to all go below the line you want to stay above. 

I like how both of these turned out!  One is kind of warm and cozy, the other one crisp and clean!  Which one do you like best??

I have one more snowman that I'm working on and a cute little Ellzybells stamp that I had in my stock. (Note: I just found out that these are no longer being made - how sad is that?!! - they were so cute)  As soon as I get some more finished, I'll get them posted.

Hope you have a great weekend!!


Friday, July 16, 2010

King of the Wild Things...

Happy Friday, everyone!! My DH and I have been busy the past couple of days helping our daughter get her new condo (new to her!) in shape. The previous owner had a large dog that shed like crazy and we've been cleaning up hair for days! Who knew a dog could shed that much hair?!!! Yesterday, I spent a large part of the day just cleaning the kitchen. It felt so good when it was all sparkling and shiny clean! Why is it always so much easier (and more fun!) to clean someone else's house than your own? :)

This is a card I made some time ago and totally forgot about. You know how sometimes you just have to clean up your stamping area for one reason or another and things get stashed away and forgotten? Well, that's what happened with this card, so I was really excited when I came across it!


"King of the Wild Things" (one of my all time favorite Stamping Bella images!), was colored with Prismacolor pencils and blended with OMS/gamsol.  I sponged around the edges with my Deckle Edge Nestabilites in place and stitched around the edges of the Basic Grey Archaic paper matted with SU black cardstock then glued that to SU Kraft cardstock.  I love this paper - it's so perfect with this image and for other dinosaur images for little boy cards. 

 The King's dinosaur skin texture was created using a technique taught by Paula, who is my IDOL when it comes to prismas!!!  (If you're lucky enough to live in the southeastern Michigan area, you should try to get in a class with her - she's the best!!) This was an easy, fun card to make and perfect for Jeanie's That's Krafty Thursday Challenge!! 

I just noticed that I didn't even add a single "sparkle" to this card!! Do you believe it?! No Stickles, no sparkles of any kind....I'm amazed I could let this card go without a single jewel!

That's it for now....hope you have a fantastic weekend!!