My Stamping Corner

Saturday, January 8, 2011

Snowmen....

Unfortunately, I'm one of those people who procrastinates and is always late with everything!  Yep, that's what happened with the Christmas cards - just didn't start early enough! The "thank you" cards weren't ready either, so I'm trying to get those finished and sent out before February hits.

Since it's still winter (brrrr...) and these are thank you cards for Christmas gifts, I figured it'd be okay if these still looked a little Christmassy.  I decided on this Penny Black snowman stamp. He's such a cutie and is pretty quick and easy to color. I did him two different ways - one on white cardstock, the other on Kraft cardstock.

The first one was stamped on Kraft cardstock.  (I'm entering this one into Jeanie's That's Krafty Thursday Challenge #45!) His body was done using a watercolor pen and a SU! White Craft ink pad. I found this technique on another blog, but can't remember which one!!  I dragged some of the ink pad right onto an acrylic block then used the watercolor pen and that ink to color the snowman's body. I used Prismacolor Pencils blended with gamsol to color his scarf, arms and earmuffs. I added some light blue shading around the image, which looks more like white in the picture, but it really is light blue!  After doing a little machine stitching around the edges, I just added some Martha Stewart snow glitter, some Stickles and a couple of punched snowflakes. 
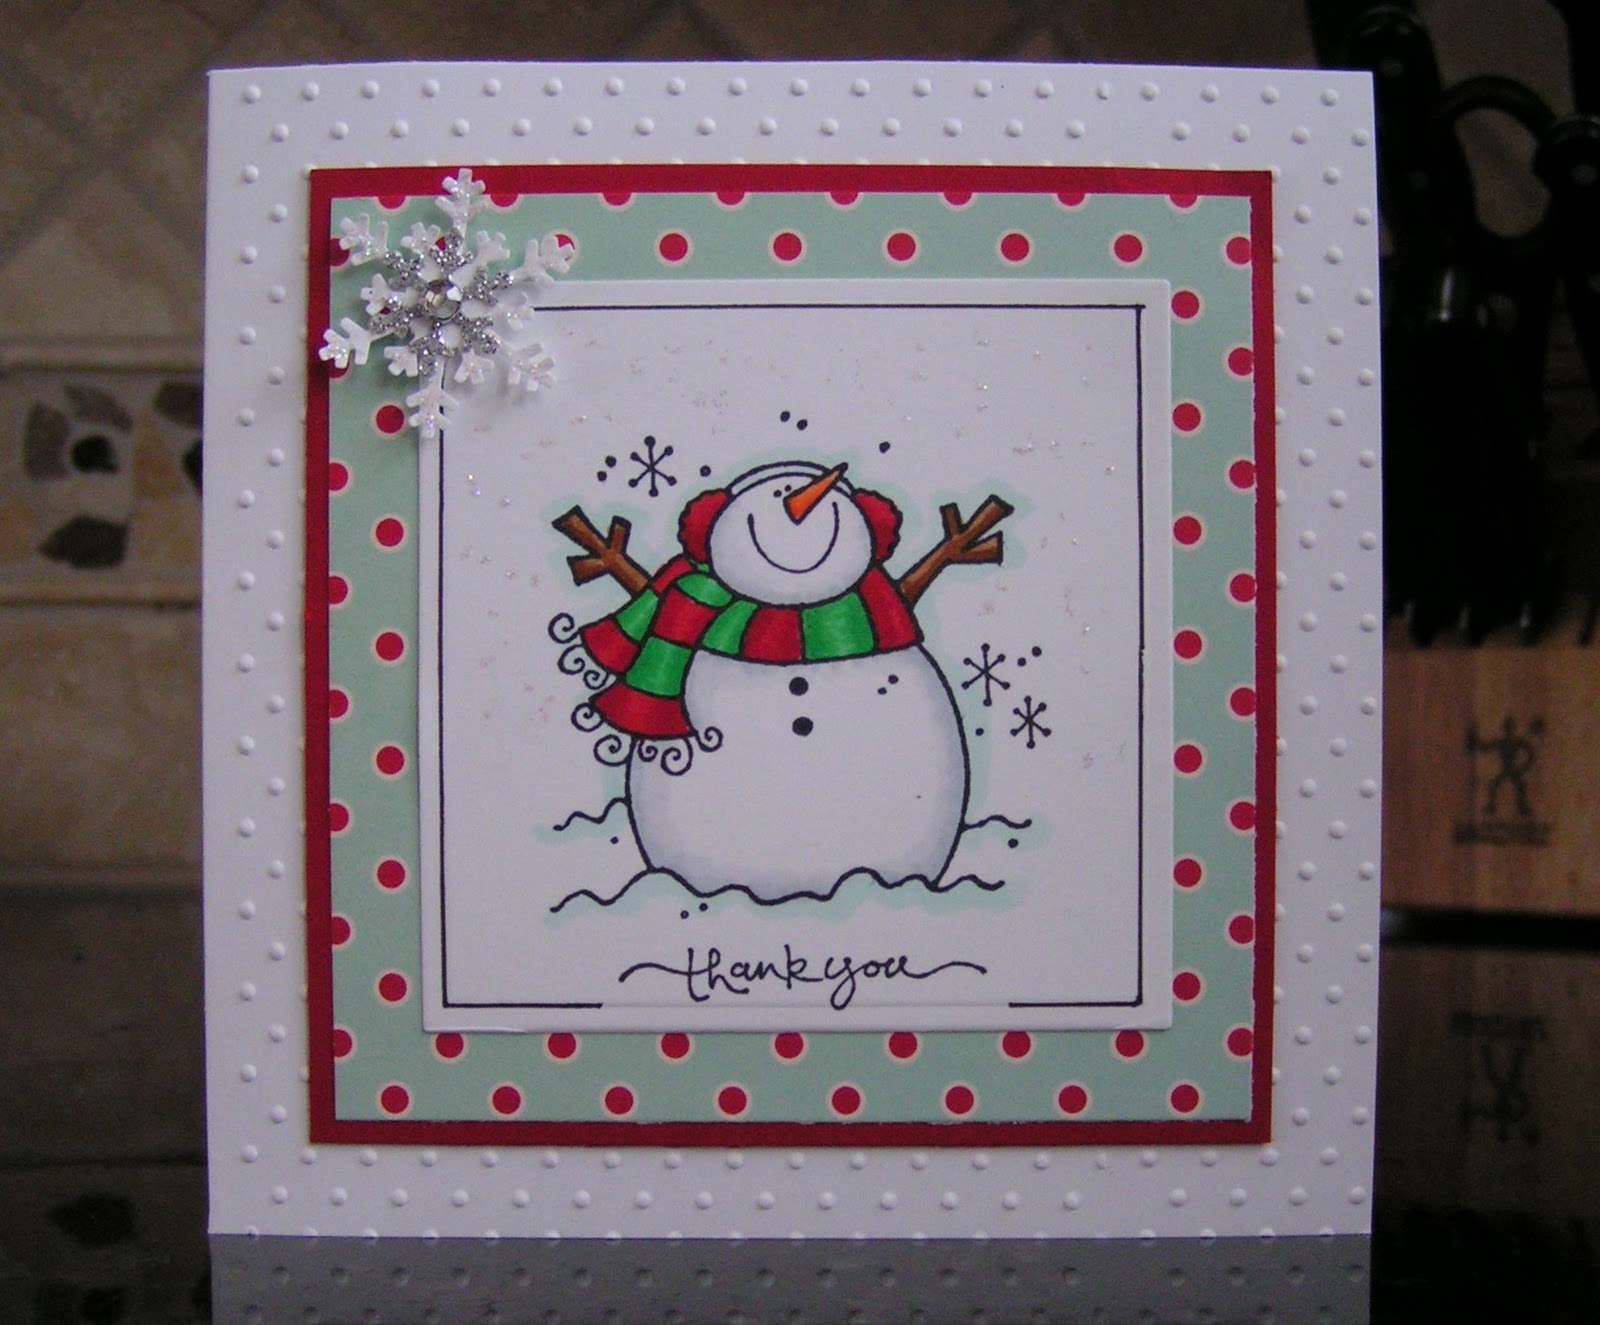

This one was colored with Copics on Bella's Bestest paper. I liked this one right away; it's bright, crisp and clean looking! So I went ahead and kept the completion of the card pretty simple too. Just a run thru the Cuttlebug for some texture, some layered paper and cardstock with some Stickles dotted here and there and a jeweled snowflake.  (gotta have a little bit of bling, you know what I'm talking about?!!)


I used a technique that I found on Jodi Collins' blog here (love her cards!) to create a frame. After stamping and embossing your image, remove it from the die and stamp the sentiment somewhere near the bottom edge. Then pop the image back into the die and trace around the inside edge with a Copic Multiliner leaving some space on either side of the sentiment.  Isn't this a cool technique and so easy to do!! I think it works best with words that are printed versus handwritten style since the handwritten styles seem to all go below the line you want to stay above. 

I like how both of these turned out!  One is kind of warm and cozy, the other one crisp and clean!  Which one do you like best??

I have one more snowman that I'm working on and a cute little Ellzybells stamp that I had in my stock. (Note: I just found out that these are no longer being made - how sad is that?!! - they were so cute)  As soon as I get some more finished, I'll get them posted.

Hope you have a great weekend!!


Monday, December 27, 2010

Good Intentions...

Christmas has come and gone and no cards were made by these two hands - I can't believe it!!  I had all good intentions....but then, you know what they say about "the road to 'you know where' being paved with good intentions!!  Where did the time go?!! What have I been doing? I remember saying to my DH sometime before Halloween, "if we don't get cracking right now, the holidays will be here before we know it and we won't be ready!" Well...guess we didn't get crackin', did we?!! 

Our youngest grandchildren
We had a such a wonderful Christmas!! Our children and grandchildren all live within about 5 miles of us and our oldest granddaughter, who lives in Chicago, came home for a few days so we were super blessed to have everyone here with us!  Let's face it....our families and friends make the holidays!  Who needs presents! We love our grandchildren, and our grown children are such fun to be around and they're just nice people to spend time with! We're very lucky.

My oldest granddaughter & my daughter
A few short days and we will begin a new year - where did 2010 go?  I retired towards the end of 2009 and thought I'd spend lots of time stamping and scrapbooking all those photos I never had time to do. There was more stamping done when I worked full time!! I think I need to make a New Year's resolution to make better use of my time..... maybe finding a place to do some volunteer work. There are so many people in need these days, it would be nice to help out.

Anyway....just wanted to wish everyone a Merry Christmas (late, I know!) and a Happy, healthy and peaceful New Year!! 


Tuesday, November 23, 2010

Happy Thanksgiving!!

I started the day today going over all of my recipes for the big Thanksgiving day feast. It seemed like I had so many different cookbooks, magazines, torn out pages, etc. and I just wanted to simplify. So...I decided to copy each recipe and then just put away all the books & magazines and just have the copy to refer to. I hope this helps me get rid of some of the clutter and be a little more organized!  Yummm....I'm already hungry for all those taste tantalizing flavors that only Thanksgiving dinner brings!

My card for today is a Whipper Snapper Designs image: Megan. She's such a cutie! I colored her with Copics and did some shading to her skirt and around the image with Prismacolor pencils and gamsol. Her shirt was paper pieced then I added some Star Dust Stickles (gotta add some bling!) and Crystal Effects to her glasses.  The sentiment is an old one from a Hero Arts set that I use a lot.  The scallop punch used is from SU! and I added the black inside the scallop edge to make it stand out a little more.  Love, love, love this paper!!  It's from My Mind's Eye and it's from the "So Sophia" collection. A little stitching, a couple of buttons and this card is good to go!

I know this is a short post, but I need to get back to my Thanksgiving preparations so I hope you'll forgive me!  Cleaning is next on my list, then checking to see that I have all the ingredients needed for dinner.  I'm ready for a busy, productive day!

Hope you all have a wonderful Thanksgiving!!  Don't forget to give thanks for all the blessings in your life.  

{{hugs}}


Monday, November 15, 2010

Once a month?.....

I can't believe it's been almost a month since my last post. I've finally got something to show today! I did a get-well card for my sister-in-law and friend who recently fell and broke her hip (yikes!).  She lives quite a distance from me (3 hours!) so it's not like I can run over a casserole to help out or anything.  She's a trooper though and I know she'll do okay with her hubby taking care of her.

I thought this Whipper Snapper stamp, "Recovering Chicken", fit the bill!  I stamped him in Momento Black ink on Bella's Bestest paper and colored him with my Prismacolor Pencils. I popped the deckled edge cutout back into the Nestability and added the shading around the outside edge with small chalk ink pad and sponge.  The cardstock I used is Riding Hood Red, which seems to be a mainstay of mine....which I think SU! discontinued (????).  (I'd love to get my hands on some more because I'm getting low!)  I added the "Ouch!" sentiment - done by my own hand, and felt like any more would've been too much. I tried adding some ribbon, but couldn't get it to look right. Since I was mailing this card, the less embellishments the better anyway! Of course, I just had to add some glitter around this chick to make her complete.  :)

A trip to Hobby Lobby and Archivers today was a special treat! But you should've seen me when I received my "Cinch" from the UPS guy!! I finally have some of the things I need to start using it after my trip - I'm excited! 
My grandson wants a fishing log book (he's 9 and is really into fishing!), so I'm going to try to make one for him. Trying to keep it fit for a "boy" and not all frilled it up will be my challenge!


Have a wonderful week!

Monday, October 18, 2010

Still trying to find my mojo.....

It's been close to a month since I posted anything....'life' seems to be getting in the way of my card making.  And the less I do, the more my mojo seems to be fading. Right now my stamping space is such a total mess - it's no wonder I don't spend more time there!  I was going to take a picture, but I'd be way too embarrassed!

Here's my attempt at Mo's Digital image "Celebrate".  I love this image! I colored it up mostly with Copics - shading with Prismas/Gamsol.  The paper is from Basic Grey's Sugar Rush collection.  The image is digital, printed on Bella's Bestest paper, other cardstock is from Stampin' Up! - Night of Navy and Almost Amethest.  The punch is Martha Stewart's Double Loops punch.  Sentiment is from an old set that was one of my first stamp sets; I think it's a Hero Art's set....not sure of the name.


This past weekend we had our annual family "Pumpkin Carving" day. Started out in the morning in 3 cars headed for the pumpkin patch!  We found one that we really like about half an hour from where we live. It's pretty basic: hayride out to the pumpkin patch, everyone jumps out and searches for that perfect pumpkin (and we all wind up with pretty much the same thing!), the hayride goes back to where our cars are parked so everyone can deposit their pumpkins then back to where we started. There's a large tent that houses the small concession stand - nothing fancy here. Just about everyone had at least a donut, some had cider, some hot chocolate. I think there's a haunted house there too, but we've never been to that.


But here's the part we like the best: the pumpkin blasters!! They have these huge "guns" that you load either with gourds or apples and shoot them at targets - it's a riot!!   


We all came back to our house for a late lunch/early dinner then we set up for our traditional pumpkin carving.  All of these events usually take place later in the day, so there's normally a few pictures when we're all finished, in the dark, of all of our pumpkins - lit up. But this year, we needed to wrap up earlier, so no final picture (boo hoo!).  Here's the one from last year....isn't this cool?!!  As you can see, we have a very imaginative group!


Here are a couple of photos from our pumpkin carving this year! :)  


Tuesday, September 21, 2010

Anniversary Wishes....

As you can probably tell if you've visited me before, my blog is not in its usual state! Somehow the list of all my favorite blogs has disappeared too. I've been trying to find time to re-do it, but for now, this will have to do....I expect to get it back to some semblance of 'normal' or at least something better soon!

This past week, my DH and I celebrated our 44th wedding anniversary - quite an accomplishment in this day and age.  I always have a hard time coming up with a card for him because I can't think of anything as good as what the Hallmark cards have to say. But I wanted to make him a card, so I did my best at expressing myself inside. It wasn't as poetic as a store-bought card, but hopefully he got it....and appreciated it even more because I made it for him! :)


I stamped "Kiss me you fool" on Bella's Bestest paper with Memento Black ink then colored with a combination of Copics and Prismacolor pencils. All the shading is done with pencils/gamsol.  The cardstock is SU!'s Ruby Red and Sage Shadow, the patterned paper is My Mind's Eye.  I used my Circles and Big Scalloped Circle Nestability to matt the image then raised on dimensionals, hand-lettered and cut the sentiment, placing under the raised image. As always, I had to add a little Star Dust Stickles to give it a little bling!

Oh darn... I just remembered that I had intended to somehow attach a little "love" charm and a "key" to my heart, but in the rush to get this done, I completely forgot.  Oh well....he already has the key to my heart anyway.  (blush!)


Saturday, September 4, 2010

Birthday Kitty.....

These days, I only seem to make a card when I need one - LOL!!  That may change now though since summer is just about over and my days will be my own again.

I needed a birthday card for a neighbor, so I dredged up this Penny Black set buried in with my clear stamps. This little kitty has never been inked up and he looked kinda cute so thought he might give my neighbor a smile!  :o)

As usual, I can't remember which Basic Grey collection this is from!  (Ha!) Hmmm....either I'm having memory issues or just have too much Basic Grey!!  (I think it's a combination of both!)  I used my big scalloped circle nestabilities and intended to layer my image on that. When I tried it, it just didn't give it the 'pop' that I wanted.....when I looked at the remnant of my die cutting, I decided to give that a try....and I liked it!  Looking at the finished product, I wish I'd done a little more stitching, but I'm pretty happy with it. :)

I colored this smiling little kitty with my prismacolor pencils & blended with gamsol. The balloons are covered with Diamond Glaze and I just had to use some glitter (on the gift, his hat & around him)!  Can't seem to do many cards without some glitter or bling!  Some ribbon remnants and a loop and this card is ready to rock & roll! 

I used the big scalloped piece (originally cut out to go behind the image) on the inside of the card as the background for the "Happy Birthday" sentiment. 


The grandkids will be back to school this week so no more coming over to Grandma's house during the day.  I'm really going to miss them!!  They have made this summer so wonderful for both my DH and I.  It's been busy...and we've been totally exhausted at times...but we have so enjoyed the time we've spent with them.  Luckily, they live close to us, so we'll still see a lot of them!   (aren't they cute?!!)

Hope you have a wonderful Labor Day weekend!!